Well I thought that might be a good topic for this ,my teaching blog.
Of course there are any number of steps you can take to make any garment look like you bought it in a boutique..
I was once a guest in a home whose hostess I did not know. I was wearing this coat
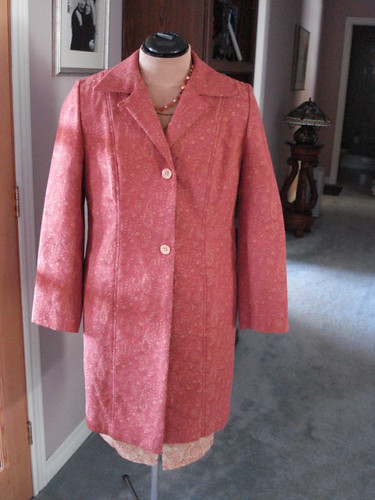
and this lady oohed and ahhed about my coat. She said it was similar to one she had seen for $600.00.She couldn't believe I had made it.
Coats are my favorite thing to make,no contest. It's probably because I have plenty of occasion to wear coats but maybe not dresses so much since being retired.
I thought I'd share a few steps to take to make a coat look like you bought it at a boutique or major department store.
#1....Interface, interface, interface. Nothing looks better in my opinion than a coat that has a certain crispness of hand.
I usually interface the whole front and sometimes the whole back of a coat.It depends on the fabric's hand or thickness.
I also interface the facings and both the upper and under collar , the hem ,the sleeve hem and the sleeve cap but not the whole sleeve..

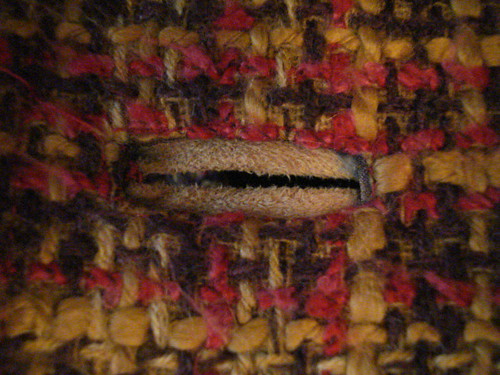
#2.Bound buttonholes,if well made (and they are not difficult if you practice a little) are an expensive looking touch on a coat.


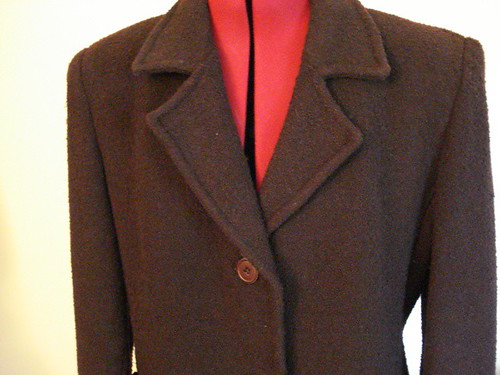
#3... When a coat has a lapel, if you take time to run an ease line along the roll line and pull up the thread just a little bit (about 1/4 to 3/8 ")and support it with stay tape, your lapel will fold back easily and also will fit closer to the body.
( sorry, can't find a photo of this process)
#4... When you've joined your coat to the lining,If you'll join the upper and lower collars at the neck seam, ( I do this by hand in the ditch, the coat won't separate when you take it off.It will feel better too.
#5...When you have sewn your sleeves in, if you stitch again from front notch to back notch while holding your free finger behind the presser foot, this will ease in some of the under arm seam . Support with stay tape and your sleeves will fit closer to the body. This too will make your coat look and feel more professional.
After the lining is in, join the under arm seams of the coat and the lining together with hand stitching.Again, this step makes the coat and lining stay together,just like a Ready-to- Wear (RTW) coat .
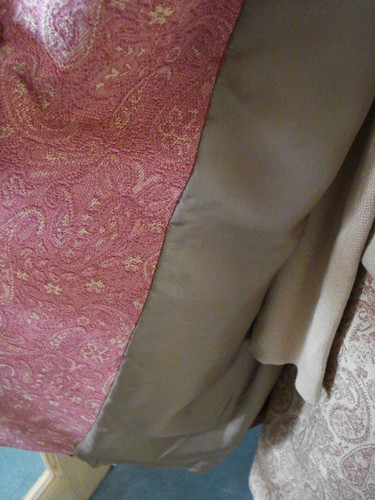
#6... Whenever possible ,if you can attach the front facings to the coat front, either by stitching by hand or by using Steam-a-Seam,your coat will stay together and will feel like those you buy at the store.
This coat used the same pattern piece for the center front and the facings so it was simple to join the two together with hand stitching.
On this coat ,I was able to join the facing and front of the coat by hand stitching with black thread through the black checks on the outside of the coat on through to the edge of the facings. It doesn't show at all on the outside .

#7...Top stitching or edge stitching can go a long way to making any garment look classy. It takes practice,but with the right kind of thread/needle combo,and some practice,you can achieve professional looking stitching around the collar,lapels and front edges of a coat,jacket shirt,etc.

When its possible, I use a top stitching thread such as Guterman's extra strong thread. If I can't match up my colours,I'll use two spools of thread threaded through the same needle. The size needle will depend on your fabric. There are special top stitching needles available but I must admit I mostly use a Universal 80/12 or 90/14.
I hope this helps someone and encourages you to go a little further to achieve professional results.
Part 2 will explain what I do to make the inside of a coat or jacket look professional and almost couture.
Happy sewing from Diana
Great tips, thanks for sharing!
ReplyDeleteThis comment has been removed by the author.
ReplyDeleteThank you so much for the sewing lessons. They are wonderful and so helpful!
ReplyDeleteThis is great Diana! Thankyou for sharing. You have some lovely coats there.
ReplyDeleteDiana, thank you for sharing! Do you use fusible or sew in on your interfacing? I notice you trim off the edges -- do you do the full 5/8ths and does it concern you at all that it might life if some of it doesn't get caught in when stitching the seam? I really appreciate your sharing your expertise.
ReplyDeleteThis is a timely post for me, because I'm beginning on a spring coat. Can't wait for post #2.
ReplyDeleteI'm in awe of your cleverness ... I'm on my first coat and loving your tutorials x
ReplyDeleteDear Diana, many thanks for your great tutorials...the one above is probably the best written tutorial I´ve ever come across. You are so clever!
ReplyDeleteDo I need an industrial or heavy duty sewing machine to sew coats or can I use my domestic sewing machine?
ReplyDeleteDiana, thank you for the tutorial! I made my first coat following your tips which are different and so much better than the instructions that came with the pattern!!! Thank you for sharing your time! Please don't give up your blog!
ReplyDeleteWhat weight interfacing would you use for wool blend coating?
ReplyDelete