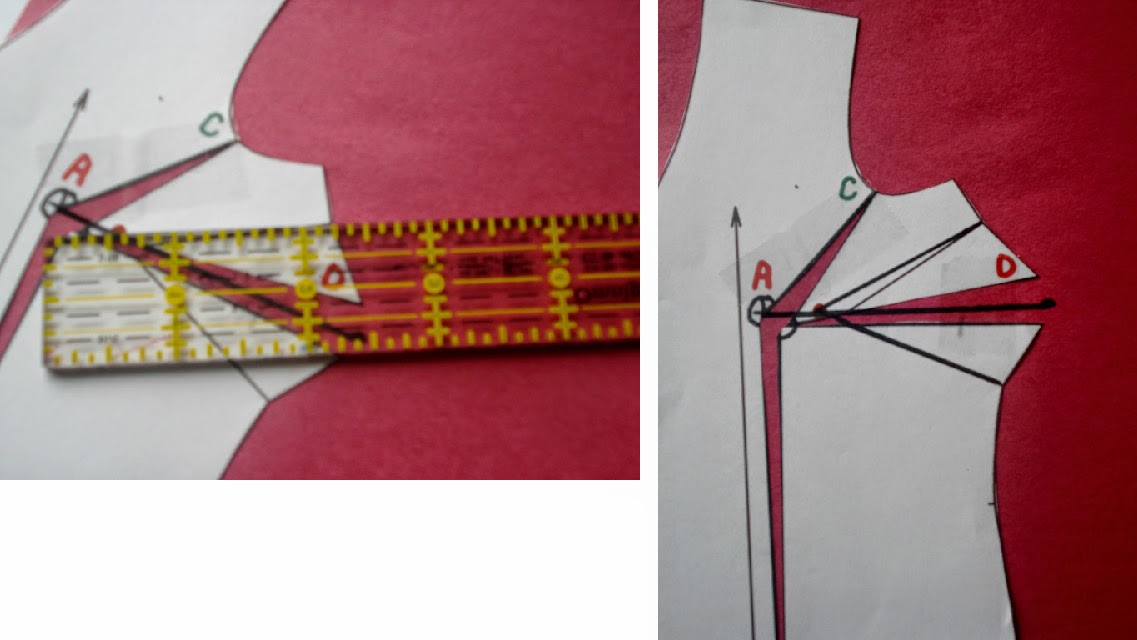
Lesson 2: FBA with Existing Dart.
This adjustment is very much like the last lesson but we have to deal with the dart that is already there.
Step 1... Locate bust point by measuring from shoulder seam at neck to center of bust
(nipple). Draw a small circle (A) on bodice front pattern to represent your measurement.
Step 2... .Draw a line from bottom of bodice front parallel to center front line to the bust point. (AB)
Draw a line from bust point to the notch on the armscye (armhole). (AC)
Draw a line joining the mid point of the dart along the bodice side to the bust point. (AD)
Step 3... Cut along the first line to the bust point and from the bust point to but not through the armscye.
Spread the pattern 1/2 inch for each cup size above a B cup at the bust point. Ex...for a D cup ,you would spread 1 inch.
At bottom , you will need to even out and add to the bottom of center front which will give you the extra length needed so your top won't hike up.
Step 5... Slip paper under the pattern. From mid point of new dart, draw a line to the original bust point. Measure back about 2" along this line. Draw a line from this point to each of the original legs on bodice side. This is the new dart .
Step 6... To even out the side of the bodice, fold the dart shut and down. Draw a smooth line with French curve and trim. When the dart is opened ,it will stick out along the side as it should.
Again, your pattern should now fit over your bust.
Technique Demonstration: Stitch in the Ditch.
Click here for instructions on how to do this very useful stitch.
Where you would Stitch in the Ditch;
1.To secure the inside of a waistband or cuffs on a shirt and to eliminate bulk.
2. At shoulder and underarm seams to secure facings so they will stay to the inside of a garment.
3. At side seams of waistbands which have been elasticized to keep elastic from shifting and rolling. ( no pic)
4. To join upper and under collar together on a jacket or other garment. (See jacket here)
Of course there are other places you might stitch in the ditch. I'll leave you to find them for yourself!
I hope this is useful to you. Please let me know if something isn't clear or doesn't make sense.
Come back next week for another lesson and technique demonstration.


As always your tutorials are very useful.
ReplyDeleteHi Diana, I'm delighted to have found your blog. I am just getting back into sewing and need some advice. Not only do I have a large bust but the fullest spot is 14 1/2" from my shoulder. I will use your tutorial to add fullness but how do I add length from shoulder to nipple? Thanks for your help!
ReplyDeleteElizabeth