Sunday, November 20, 2011

Faux Piping Trim

I recently made this coat which I've posted on Sew Passionista.


I thought I'd show you how I achieved the look of piping along the front openings.


It's simple really. When you press the facing of the garment , you roll a little out to show from the right side. Then you stitch in the ditch to fasten it permanently. It's that easy.


When sewing with faux leather like mine, it's necessary to use strips of tissue paper under the fabric on top of the feed dogs because it just won't budge otherwise.(see photo above) You then peel the tissue off and pick out any residue from the paper.


And that's all there is to it!

More another time from

Sunday, November 13, 2011

Just a Word About Flat Felled Seams

Savannagal left a comment about flat felled seams in my last post. She said

My question is: I am wondering if this type of seam (flat felled) finish is commonly used on specific seam locations. Or if it can be used anywhere on a garment. I'm wondering because it appears that there are two lines of sewing on the outside of the garment wherever this technique is used.

Here's what I do.I usually use flat felled seams on seams that are straight like a shoulder seam , a side seam, or the under arm of a sleeve, etc. I believe you could use only one line of stitching if you wanted to. I usually use two because I love to top stitch as many of you know.Here are two photos. Unfortunately, they are both of light coloured garments.

This shows a side seam on this jacket


This one is a neckline and shoulder seam on this jacket


Having said that however, I've used flat felled seams on the seam joining the sleeve to the armhole with good results. It can be done on wool, linen and cottons that have some give to them. I doubt this would be successful on polyester though.Here's an example on a thick quilted cotton jacket I made a few years ago.


Savanna, I hope I answered your question. If not, please let me know.

Sunday, November 6, 2011

Alternative for a Bust Dart on a Knit Garment

I don't know about you but I don't find a bust dart (especially for a D cup) attractive on a T-shirt. There's another way, thank goodness!

I usually add an inch to my front pattern piece to accomodate a bust dart. On knits, you can run a row of long stitches, ( I use 5.0 length of stitch) and pull up a little and then ease the front to the back at the side seams and it hardly shows at all.


This is what it looks like on the outside.


This is the finished top.


I hope I didn't over simplify but that's really all there is to it!

Happy sewing from


Tuesday, September 13, 2011

Seam Finishes

Lately, sewing for me has been all about making the inside of garments look as good,(or almost as good),as the outside.

I thought I'd show you some of the things I've completed this summer, but from the inside.

This version of Vogue 8605 looks like this on the inside.


I recently made a pair of navy dress pants (not blogged) that have this pretty inside finish.


My new jean jacket and skirt set looks like this on the inside.


My sister's birthday present looks much more classy when the inside looks like this


What do you think?

In all of the above ,I used the Hong Kong finish to pretty up the seams


as well as flat felled seams.


I covered the Hong Kong finish in this post.

Now for flat felled seams ( with,of course the help of photos.)!.

Step 1...Sew your 5/8" seam and press it open.


Step 2... Trim away one side of the seam allowance to about 1/8".


Step 3... Fold about 14" of other side of seam allowance and press.


Step 4... Stitch the edge of this fold close to original seam line (no photo) . It will look like this on the right side.


The flat fell seam is a very tidy way to finish the inside seams and would work very well on its own without using the Hong Kong finish. But I love the contrast and the look that the Hong Kong provides.

NowI challenge you to give this a try and to take your sewing to another level

Have fun sewing!

Monday, July 4, 2011

An Invisible Zipper, My Way

I feel a little funny introducing a "new" way of working with an invisible zipper
but, here goes. This is what I do.

Step 1(no photo for this one)-
Fuse strips of interfacing about 3/4" wide and 2" longer than the zipper to both seam allowances of the center back of your garment. (Oh, by the way, it helps a lot if you iron the teeth of your zipper flat with a not too hot iron.)

Step 2-
Baste the two back pieces together as far as the length of the zipper being careful that the waist or bodice seams of both sides match.


Step 3-
Lay the zipper, right side down,with teeth along the joint of the seam.


Step 4-
Baste the zipper where the waist or bodice joins the skirt part of the garment to assure that the waistline or bodice seams are not distorted when you apply the zipper.


Step 5-
Starting at the waistline where you just hand stitched,sew the side of the zipper to the seam allowance while pushing down to flatten it against the fabric.Starting at the waist again, sew the top half of the zipper to the seam allowance. Repeat on the other side.


This is the zipper joined to the seam allowances.


Step6-
Take out the basting from the center back seam.
This is what you have on the right side now.


Now go ahead and apply your zipper using the special invisible zipper foot that came with your machine (right) or if you don't have one you can buy one of these (left) for very little money and it works just fine.


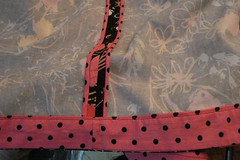
Because you have attached the zipper to the seam allowances, it won't move while your attaching it permanently and your joining seams at the waist will look like this...


Just an added note.You may have to play with the position of your needle to get the zipper to be "invisible.If it's not right the first time , try it again. It does take practice but it is so worth it. See!!


I hope these directions are clear. If they're not, please let me know and I'll rewrite.

Good luck. I hope this works for you.


Thursday, June 23, 2011

How I Sculpted the Pockets On Butterick 5646

If you look on my other blog, you'll see View B of this pattern (B5646)made up.


The fabric was very drapey and the pockets which had two side pleats were difficult to shape into the square they're supposed to be.

Well, I got the idea of cutting out the shape and size of the pockets out of wash away stabilizer and that worked just fine.

In this pic, you see that I've formed the facing of the pocket at the top so I cut the stabilizer to fit below that.


I just forced the cut piece of fabric to take the shape of the stabilizer and sewed around it.


I trimmed away the bulk of the stabilizer ,then turned it to the inside and pressed. I probably should have turned it first before cutting away the stabilizer, but my way worked just fine.


I positioned the pocket in place and stitched around it with no trouble.


I then tore away as much of the stabilizer as I could. The rest will wash out later. It's not noticeable at all from the outside in any case.

The pleated drapey pockets are a nice feature of this design ,IMO.


So there you have it. A simple solution to difficult pocket.

Thursday, May 19, 2011

Funky Bound Buttonholes

I made fun buttonholes for this jacket and I thought I'd share how I made them.


Here is a close-up of the buttonhole....


and the facing....


I first decided on the shape and drew it on rectangles of silk organza....


I positioned these on the jacket front. ( I forgot to take a photo but here's one for the facing)and sewed around the shape....


Next step was to cut through both layers....


I then turned the organza to the inside and pressed....


For the lips of the buttonhole ,I took two rectangles of linen and sewed them together down the middle....


I then pressed them like this....


and positioned them behind the buttonhole opening using Wonder Tape to hold them in place and top stitched them in place....


This is what the back of the buttonhole looks like.....


I trimmed off the excess....


This is how I faced the buttonholes.... It's self explanatory so I'll let the pictures do the talking


I used Wonder Tape to hold the facings in position while I stitched around them....


I hand stitched around the buttonhole.


I added a rectangle behind the buttons to support them.


I love these buttons! I stole them from this jacket and will have to replace them this fall.


So that's it. Now you try it!!

More later from