I prefer these because you end up with only one layer of pocket and they are less bulky than traditional pockets.
. Whenever possible ,I like to substitute the method I'll show you here learned from Sandra years ago when I made this coat using this pattern.

For this method, You'll use the same markings for the side pockets of the pattern you are using.
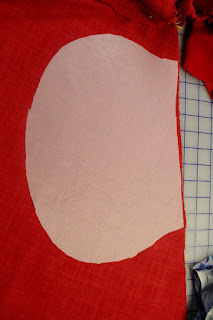
The shape of the pocket is up to you. In the coat above ,the pocket is quite large and the shape is angular. For the red coat, I used an enlarged version of the pocket included in the V1474 but I only cut one pocket piece for each side of the coat.
You'll also need to cut the pocket in fusible interfacing. Again, I cut mine slightly larger than my pocket piece for extra stabilizing (if that makes sense ).
The pocket will of course be sewn to the inside of the front of the coat but first attached to the back side seam. So here goes.
Step 1 . . Iron the interfacing in place. is to iron on the interfacing to the pocket area on the inside front of the garment.
Step 2 (sorry no pic) is to run a little line of stitching across the circle marking which indicate the pocket opening on the side seam and then to clip to the circle and press the opening to the inside and top stitch like this.
I chose to finish the opening edge with a bias piece of my lining fabric, but you could finish it with a serger or by folding in the seam allowance.

Step 3... Sew the pocket to the side seam of the back of the coat starting and finishing at the notches that mark the pocket placement on the side seam. Because I cut my pockets with a lighter linen in a different shade of red, I added a strip of the coat fabric to the edge of the pocket but this step is unnecessary.

Step 4... You can finish your pocket edges any way you chose. I serged mine but for an unlined garment I would do a Hong Kong finish..
Step 5...You're ready to sew your pocket to the inside front but it will be a lot easier with the help of Steam-a-Seam. Just be sure to apply it to the side of the pocket that will be against the coat ( ask me why I mention this !) Press in place.
Step 6...Change your bobbin thread to a contrasting colour and run a line of basting stitches along the edge of each pocket.
When you turn to the right side you will have a thread tracing to follow when you top stitch.
Note:To top stitch, whenever possible, I like to use a heavy duty thread by Gutterman but when that's not possible, I'll use two spools threaded through the same needle for similar results.
And that's all there is to it. I do hope this is clear but if you have any questions, please let me know in the comments section.
You never know when I'll post again on this blog so if you're interested in what I have to teach, come back again sometime.


Love your coat. And thanks for the pocket tutorial. I'm going to try that on my next casual jacket I'm putting in the queue.
ReplyDeleteThank you for doing the pocket tutorial for us.
ReplyDelete